How to Sharpen Scissors: Methods by Blade Type
- Review by
- Edge & Pivot Editorial Team
- Last checked
- First published
- Filed under
- Sharpening
To sharpen scissors, clean and inspect them, then restore the existing bevel on each blade with a sharpening stone or diamond sharpener, remove the burr, oil the pivot and test-cut. Household and kitchen scissors can often be done at home; hair, thinning, tailoring and micro-serrated pairs are better sent to a professional. Never grind the inner faces.
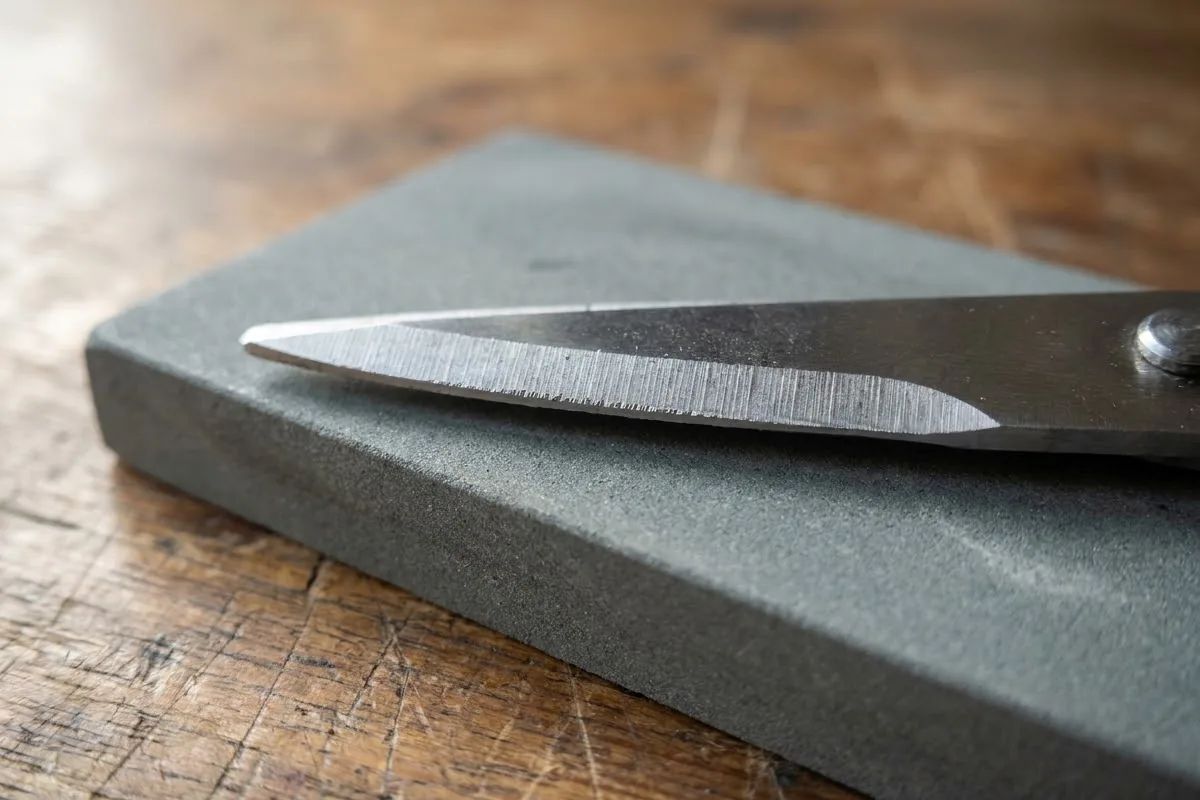
Sharpening scissors means restoring the cutting bevel on each blade without changing its angle, then removing the burr, oiling the pivot and checking the tension. Most of the work is to preserve what the factory ground into the blade. This guide shows which method fits which kind of pair and links to the step-by-step pages for each. The short version of the home routine is on how to sharpen scissors at home.
Safety note. Scissor edges are sharp even when dull. This is general information, not a substitute for the maker’s instructions for your pair. Push the stone or file away from your body, keep fingers clear of the edge and wear cut-resistant gloves if you are unsure. Reviewed by the editorial desk against the cited sources.
Do your scissors need sharpening?
Scissors need sharpening when they fold, snag or slip on material they used to cut cleanly. One maker lists the signs as material folding or snagging, uneven or inconsistent cuts, more resistance while cutting, slipping on smooth surfaces and visible wear along the edge.
Rule out two look-alikes before you reach for a stone:
- Dirt or residue. Adhesive, sap or lint on the blades can feel like a dull edge. Wash and dry them first.
- A loose or over-tight pivot. The same maker notes that dirt build-up or incorrect adjustment can mimic a dull edge. If the blades splay apart or bind, adjust the screw (where the pair has one) before sharpening.
Sharp tools matter for more than convenience. OSHA’s hand-tool booklet states that “knives and scissors must be sharp; dull tools can cause more hazards than sharp ones.”
How a scissor edge works
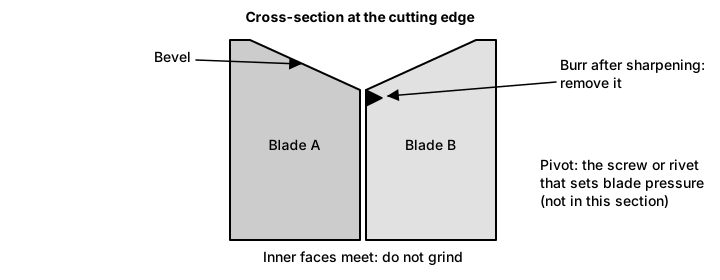
Each blade has a cutting bevel on one side and a flat inner face that glides against the other blade. Sharpening works the bevel; the inner face is left flat so the two blades can shear past each other. That is why “keep the factory angle” is the rule you will see in every maker guide: one sharpener maker’s page says to maintain the angle the manufacturer put on the blade.
- Bevel: the angled cutting surface you sharpen.
- Inner face: the flat surface that meets the other blade; do not grind it. One maker lists altering the inner surface as one of the most common sharpening mistakes.
- Pivot: the screw or rivet that sets how hard the blades press together.
- Burr: a thin wire of metal pushed to the far side of the edge during sharpening; it must be removed.
Method overview by blade type
| Blade type | Home sharpening? | What the sources say |
|---|---|---|
| Straight household and kitchen scissors | Often | Stone or diamond sharpener along the existing bevel; keep the angle (home routine, stone) |
| Fabric and tailoring shears | Cautiously | Premium tailoring pairs are generally best sent to a professional (fabric) |
| Pinking shears | Rarely | Teeth are shaped; a sharpening-equipment maker says never to sharpen in between them (pinking) |
| Hair and thinning shears | No | Edge angle, blade curve and alignment need a trained technician (hair) |
| Garden snips and pruners | Yes, on the bevel only | Extension guides: keep the factory bevel; never sharpen the back (garden) |
| Micro-serrated kitchen scissors | No | One maker lists them as best left to a professional |
Not sure which row you are in? The free method chooser walks through it, and the scissor type picker helps if you are not sure what kind of pair you own.
The three kinds of method
Stone or diamond plate. A flat sharpening stone or diamond sharpener lets you match the existing bevel by hand. This is the method most guides describe for straight blades, with a few smooth strokes from the screw area toward the tip, checking often rather than removing excess metal. Details are on the page about sharpening scissors with a stone.
Sharpening tool with an angle guide. Some sharpeners carry a scissor guide that fixes the angle for you. One scissor maker advises maintaining the existing blade angle, which a fixed-angle guide cannot adapt for every pair. Use them only on pairs where the angle is plain and the maker does not object.
Professional or maker service. For specialty edges, send the pair to a trained sharpener or the maker. A maker of premium scissors says specialist scissors should go to a professional sharpening service, and a hair-shear maker says shear edges should only be sharpened by a technician who understands their edge angle, blade curve and alignment.
Which method for which scissors
- Household and kitchen: stone or diamond sharpener at home. See the kitchen scissors guide for what they are built to do.
- Sewing: treat dressmaker shears carefully and read fabric scissors before deciding.
- Pinking: see the zigzag-edge guide for how the teeth work.
- Hair: see barber scissors and shears for edge types. Sizing is covered in the hair shear size tool.
- Garden: see the garden pruning guide for bypass and anvil types.
How often to sharpen
Sharpen when cutting declines, not on a calendar. One scissor maker says frequency depends on how often the scissors are used and what they cut, and advises sharpening before they become excessively dull. Another maker of premium scissors gives a rough guide of about every three months for heavy daily use and once a year for occasional use. A pair used daily on tough material will need attention far sooner than one used for the odd envelope.
A useful habit is a quick test cut each time you pick up a pair you have not used for a while. If it folds thin material rather than cutting it, check cleanliness and the pivot, then decide between a home touch-up and a service.
What to ask a professional sharpener
When a pair is too specialised or too damaged for home work, ask before you hand it over. A shear maker advises asking which method the sharpener uses, whether they take the pair apart, and whether they will restore the factory edge. The same source notes that hand sharpening usually will not remove nicks or repair severe damage, which is another reason to use a service for damaged pairs. Ask the same questions of a mail-in service, and check the maker’s own repair page first if the pair is still under its care.
Choosing between home and professional
Use these questions as a decision aid, not a rule:
- Is the pair a straight, plain-edged household or kitchen blade? Home sharpening is usually reasonable.
- Is it shaped (pinking teeth), curved (convex hair edge) or micro-serrated? Use a specialist.
- Is it expensive to replace or valued for its fit? Use the maker or a trained sharpener.
- Is it nicked, bent or loose beyond adjustment? A service can often judge whether it is worth repairing.
- Are you unsure of the bevel? If you cannot tell which face is the bevel, do not start.
Common mistakes
- Grinding the inner face. It spoils the way the blades meet.
- Changing the angle. A new angle can hurt cutting. Keep the bevel you were given.
- Removing too much metal. A few passes are usually enough; check progress often.
- Skipping the burr. A burr makes the blades catch. Lightly pass a fine stone over the inner side, without altering the inner surface.
- Sharpening a dirty or loose pair. Clean and check the pivot first.
- Using the wrong tool on shaped edges. Pinking teeth and convex hair edges are not for DIY.
Aftercare: clean, oil, test cut
Wipe off residue, put a small drop of scissor oil at the joint, open and close the blades several times, then adjust the screw tension until the blades move smoothly without excessive play. Then cut the material the scissors normally cut and look for a clean cut from tip to pivot. For ongoing cleaning, oiling and storage see scissor safety and care.
One more habit helps the edge last: use each pair for its own job. A maker of premium scissors warns that cutting inappropriate materials can dull the blades and damage the edges, and that even quick paper cuts with good shears can shorten their lifespan.
Where this guide stops
This page gives an overview and decision help, not figures for every pair. No source we opened gave a grit recommendation for scissors, so none is given here; follow the maker’s own sharpening guide, and where none exists, keep to the factory bevel and ask a professional about specialty edges. For the wider family of blades, start at the scissor kinds overview or the free tools.
All Sharpening guides
- Does Cutting Aluminum Foil Sharpen Scissors?
Does cutting aluminum foil sharpen scissors? What the opened maker sources say about foil, honing and burrs, and what to do for a truly dull pair.
- How to Sharpen Fabric Scissors Without Ruining Them
How to sharpen fabric scissors without ruining them: why shears dull, what to check first, home options versus a maker or professional service.
- How to Sharpen Garden Scissors and Pruning Shears
How to sharpen garden scissors and pruning shears: clean first, file or stone the bevel side only, remove the burr, oil, and disinfect when needed.
- How to Sharpen Hair Scissors: Options Explained
How to sharpen hair scissors: why shear edges differ from household scissors, what makers say about service versus DIY, and care that delays dulling.
- How to Sharpen Pinking Shears: What Works
How to sharpen pinking shears: why the zig-zag blades are different, what home sharpening risks, what a maker of sharpening equipment says, and care tips.
- How to Sharpen Scissors at Home: Step by Step
A step-by-step home routine for plain household scissors: clean, sharpen the existing bevel, remove the burr, oil and test cut, plus when to stop.
- Sharpen Scissors with a Whetstone: Grit and Angle
How to sharpen scissors with a whetstone: matching the factory bevel, stroke direction, burr removal, and what the sources do and do not say about grit.
FAQ
Can I sharpen scissors at home?
Often, yes. One scissor maker says many household and kitchen scissors can be sharpened at home with a sharpening stone or diamond sharpener, as long as the existing bevel is kept. Specialty pairs, badly damaged blades and anything where precise geometry matters, such as hair, thinning, tailoring and micro-serrated scissors, are usually better handled by a professional.
How often should scissors be sharpened?
There is no fixed schedule. A scissor maker advises sharpening when cutting performance declines, because the right interval depends on how often you use them and what you cut. Another maker suggests roughly every three months for heavy daily use and about once a year for occasional use. Treat those as rough guides and watch for folding or snagging.
Is there a best way to sharpen scissors?
It depends on the blade. Straight household blades can be restored on a stone or diamond sharpener along the existing bevel. Pinking, serrated, hair and thinning blades have shaped edges that most home methods can damage, so the maker's service or a trained sharpener is the safer route. The best method is the one that keeps the factory edge geometry.
Why are my scissors dull even after sharpening?
Dirt build-up, rust or a loose or over-tight pivot screw can mimic a dull edge, so check those first. Sharpening can also leave a burr on the inner face that makes blades catch, or it can change the angle if too much metal is removed. Remove the burr with a light pass, clean, oil the pivot and adjust the tension.
Do I need to take the scissors apart to sharpen them?
Where the pair comes apart, separating the blades makes cleaning and sharpening easier and lets you check the joint and inner surfaces for burrs. Many scissors are riveted and cannot be taken apart; follow the maker's instructions for your pair and never force a fixing that is not meant to be removed.
Are household tricks like cutting foil a real way to sharpen scissors?
No maker or extension source we opened supports them as sharpening, and a hair-shear maker lists cutting through foil as a reason to send a shear in for service. See our dedicated guide on the foil myth for what the sources say.
Sources
- Victorinox: How to Sharpen Scissors (victorinox.com)
- Work Sharp: How to Sharpen Scissors (worksharptools.com)
- Whiteley: How to Take Care of Premium Quality Scissors & Shears (whiteley.co.uk)
- OSHA 3080: Hand and Power Tools (osha.gov)
Keep reading
- Does Cutting Aluminum Foil Sharpen Scissors?
Does cutting aluminum foil sharpen scissors? What the opened maker sources say about foil, honing and burrs, and what to do for a truly dull pair.
- How to Sharpen Fabric Scissors Without Ruining Them
How to sharpen fabric scissors without ruining them: why shears dull, what to check first, home options versus a maker or professional service.
- How to Sharpen Garden Scissors and Pruning Shears
How to sharpen garden scissors and pruning shears: clean first, file or stone the bevel side only, remove the burr, oil, and disinfect when needed.
- How to Sharpen Hair Scissors: Options Explained
How to sharpen hair scissors: why shear edges differ from household scissors, what makers say about service versus DIY, and care that delays dulling.
- How to Sharpen Pinking Shears: What Works
How to sharpen pinking shears: why the zig-zag blades are different, what home sharpening risks, what a maker of sharpening equipment says, and care tips.
- How to Sharpen Scissors at Home: Step by Step
A step-by-step home routine for plain household scissors: clean, sharpen the existing bevel, remove the burr, oil and test cut, plus when to stop.